The Ultimate Air Fryer Poached Egg Recipe
Forget the swirling water and vinegar! Air frying is the easiest, most foolproof way to get perfect, silky soft yolks inside delicate, fully-set whites—every single time.
Why This Method Wins
-
No Fuss: No straining, no swirling, no watching a pot.
-
Consistency: The enclosed, circulating heat cooks eggs evenly.
-
Batch Cooking: You can make multiple eggs at once.
-
Easy Cleanup: Just a quick rinse of the ramekin or dish.
Ingredients & Tools
-
Fresh large eggs (as fresh as possible for the best shape)
-
1-2 tsp water, milk, or butter per ramekin (for steaming)
-
Salt and pepper to taste
-
Optional add-ins for the ramekin:
-
A pinch of shredded cheese
-
A drizzle of cream
-
A thin slice of ham or prosciutto at the bottom
-
Essential Tool:
-
Heatproof ramekins, silicone cupcake liners, or small oven-safe dishes that fit in your air fryer basket.
Step-by-Step Instructions
Step 1: Prepare the Air Fryer & Ramekins
-
Lightly grease your ramekins or silicone cups with cooking spray, butter, or oil.
-
Add 1-2 teaspoons of water or a small pat of butter to the bottom of each cup. This creates steam for the perfect poached texture.
-
Optional: Place your air fryer ramekins or liners into the cold air fryer basket. You can also preheat the air fryer to 300°F (150°C) for 3 minutes for a more consistent start.
Step 2: Add the Eggs
-
Crack one fresh egg directly into each prepared ramekin. Be careful not to break the yolk.
-
Do not stir. For a “cloud egg” style, you can separate the yolk and whip the white until stiff, then place the yolk in the center.
-
Season lightly with salt and pepper.
Step 3: Air Fry
-
Cook at 300°F (150°C) for 5-8 minutes.
-
For Runny Yolks (Soft Poached): Start checking at 5 minutes. The whites should be just set and opaque.
-
For Jammy/Medium Yolks: Cook for 6-7 minutes.
-
For Fully Set Yolks: Cook for 8+ minutes.
-
-
Crucial Tip: All air fryers vary. Your first batch is a test. Open the basket carefully to check doneness. The eggs will continue to cook slightly from residual heat.
Step 4: Remove & Serve
-
Use tongs or oven mitts to carefully remove the hot ramekins.
-
Run a small knife or offset spatula around the edge of the egg to release it, then gently slide it onto your plate.
-
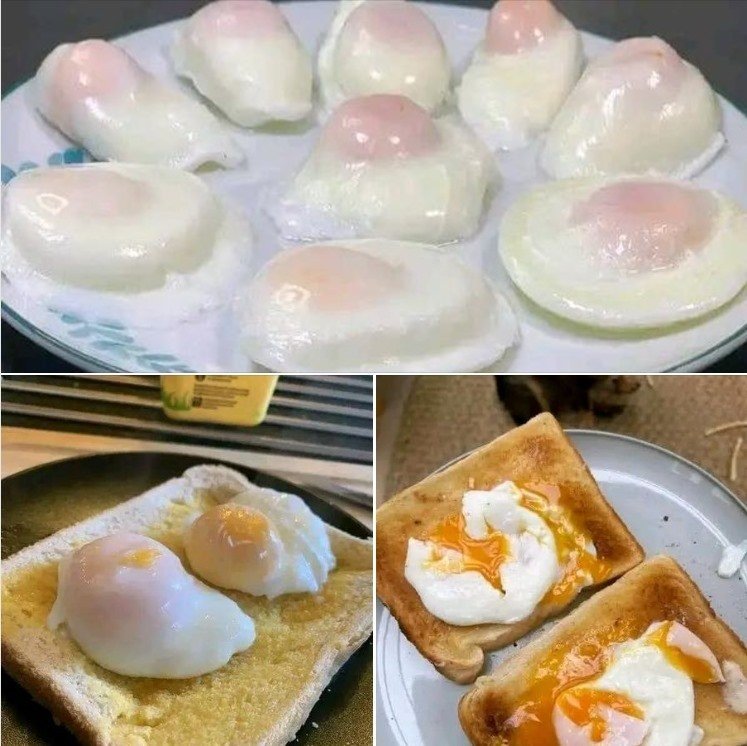
Serve immediately over toast, avocado, salads, or English muffins for Eggs Benedict.
📝 Pro Tips for Perfection
-
Freshness is Key: The fresher the egg, the thicker the white and the better it will hold its shape.
-
Don’t Skip the Liquid: The water or butter is non-negotiable for preventing rubbery whites.
-
Batch Cooking: You can cook 2-4 eggs at once, depending on your air fryer size. Just ensure the ramekins aren’t touching for even air circulation.
-
Preheating Debate: Starting from cold gives more gradual cooking, which some prefer. Preheating can lead to slightly faster, more consistent results. Try both!
-
For Easy Cleanup: Silicone cupcake liners are fantastic—the eggs pop right out.
⏱️ Doneness Chart (at 300°F / 150°C)
| Time | Yolk | White |
|---|---|---|
| 5 min | Very runny, warm liquid | Set, very tender |
| 6 min | Runny, thicker liquid | Firmly set |
| 7 min | Jammy, custard-like center | Fully set |
| 8+ min | Fully set | Fully set |
Enjoy your effortlessly perfect, restaurant-quality poached eggs made right in your air fryer! It’s a game-changer for busy mornings and elegant brunches alike.